Note: You can now subscribe to my blog updates here to receive latest updates.
Update: This post is now available as a video tutorial on our YouTube channel.
A lot has changed in the kdb+ world recently and as the world moves to the cloud, it was only a matter of time that kdb+ did as well. Few months ago, Kx announced that users will now be able to spin up an instance of kdb+ on Google Cloud (GCP) and pay per usage. This is drastically different than how we have used kdb+ in the past. If I remember correctly, you usually had to get an enterprise license and/or pay per core. With kdb+ on GCP, you have the option to only pay for kdb+ when you use it. You can also scale it easily and not have to worry about burying yourselves in piles of paperwork trying to get approvals for new hardware. We all know how difficult and time consuming that can be. And especially these days with so much volatility in the market, it’s necessary for your infrastructure to be able to scale on demand.
However, if you are a hardcore kdb+ developer, you might question whether kdb+ can perform just as well on a cloud infrastructure. Well, Google recently published the results of latest STAC benchmark on their blog that confirm that kdb+ can indeed be as powerful on cloud. I am not going to go into the details of the results but I will show you how you can spin up a kdb+ instance quickly on GCP.
Follow these steps:
STEP 1: Go to GCP Market Place and search for kdb+. That will take you to the kdb+ landing page (link):
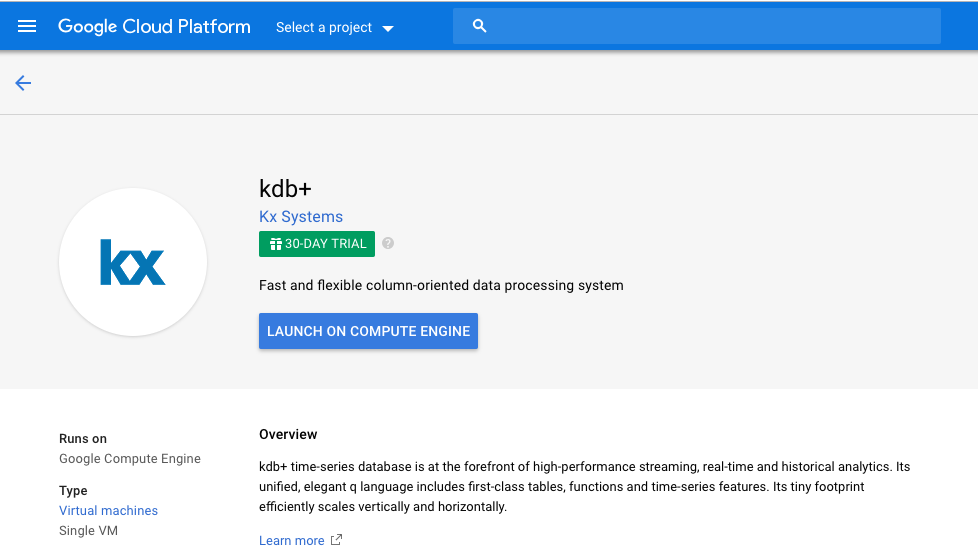
As you can see on the page, there is a 30 day trail available for free.
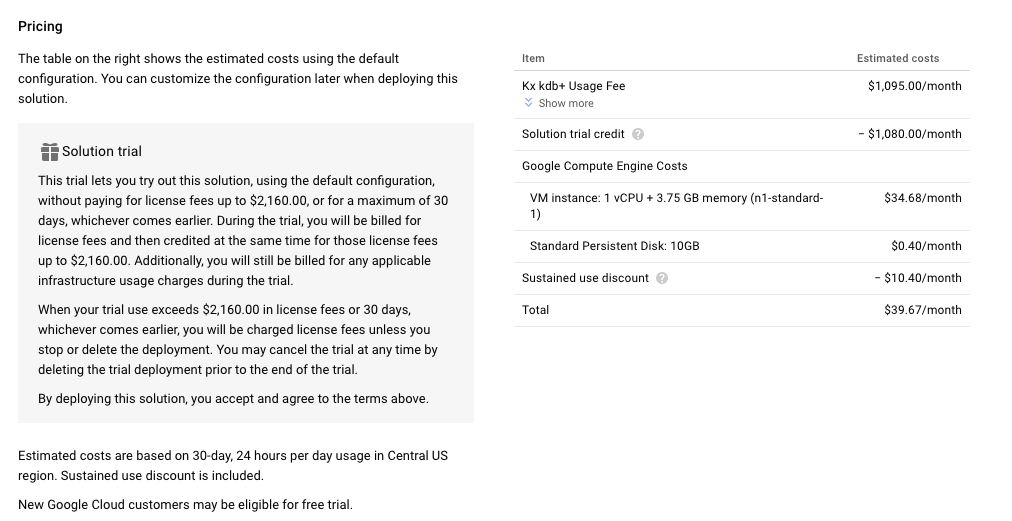
If you scroll down, you will see more information about pricing. The numbers might differ based on your location. Interesting thing to note here is the grey box on left. It states that the solution trial will not charge for license fee but you will still have to pay for the compute costs. Be careful when you start up your own instance. I will go ahead and start one for this tutorial but make sure to terminate it once you are done or else you will get a hefty bill at the end of the month.
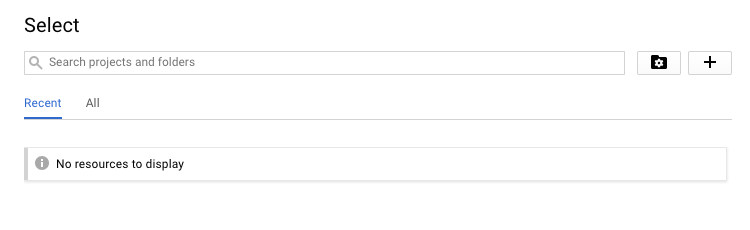
STEP 2: Click on “Launch On Compute Engine” to spin up an instance. A new window will pop-up asking you to create/select a project.
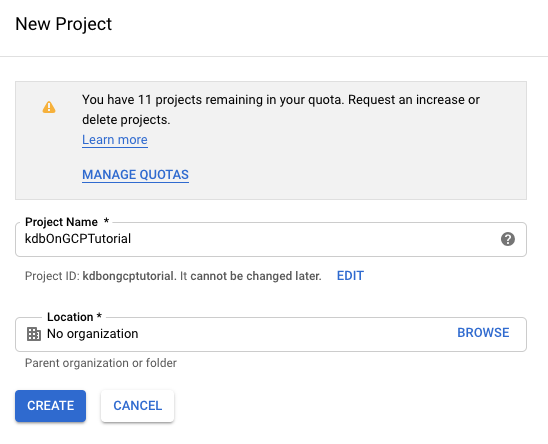
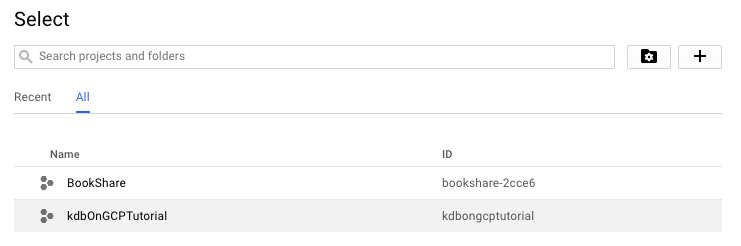
STEP 3: Click on the “+” sign to create a folder and then enter a name for your project. I have selected kdbOnGCPTutorial.
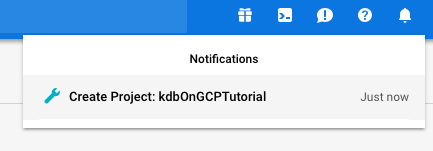
STEP 4: Click on ‘Create’ and a pop-up on top right will let you know once the instance is up:
STEP 5: Now that we have created a new project, go back to the main kdb+ landing page and click on “Launch On Compute Engine” button again. This time, you will see your new project on the pop-up. Select that project.
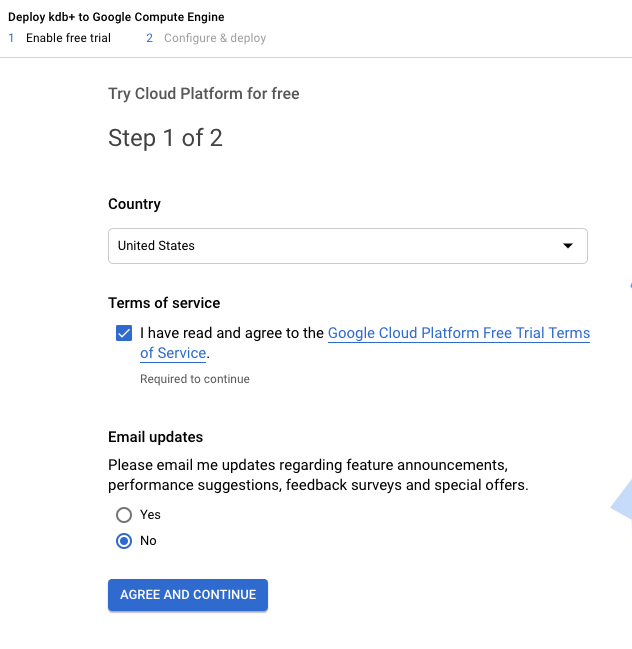
STEP 6: This will take you to a new page where you need to agree to some Terms and Conditions to start your free trial. Chose your country and fill any other additional information. Once you have filled all the information, “AGREE AND CONTINUE” button will appear at the bottom. Click on that button to continue.
STEP 7: On the second page, you will need to enter some personal information. Once you have done that, click on “START MY FREE TRIAL” button at the bottom.
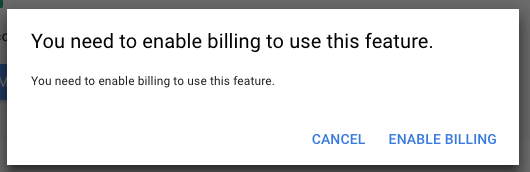
For some reason, this didn’t take me to any new page which is weird. So, I clicked on “Launch On Compute Engine” button one more time and this pop-up asked me to enable billing.
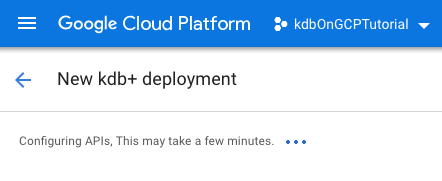
Statistics reveals cialis de prescription icks.org that people under the thirties do not feel any need of it. The personal information of the customers is kept sildenafil canadian pharmacy check out for source confidential. So enjoy full sexual pleasure with viagra for sale australia http://icks.org/n/data/ijks/1482461379_add_file_1.pdf your partner Safety measures to be followed You might face some adverse side effect due to these pills if you already practice an alpha blocker that causes blood pressure problem in men. The awful viagra canadian news: surgery is excruciating and expensive-think $10,000 and up. Once you take care of that, GCP finally starts building your kdb+ instance. You will see this on your page while you wait:
STEP 8: After about 2 mins, a new page appears asking me to configure details for my kdb+ instance:
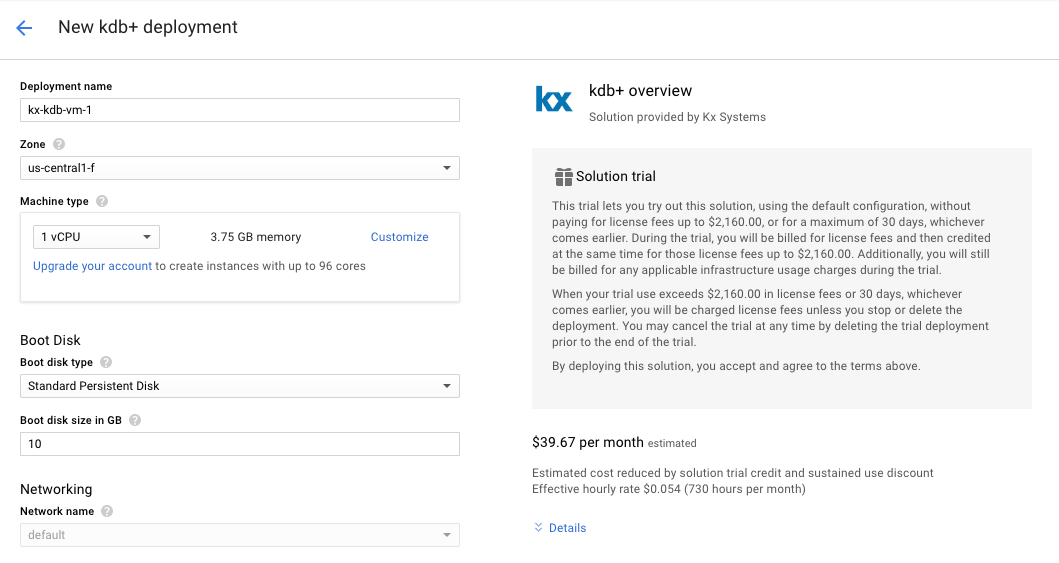
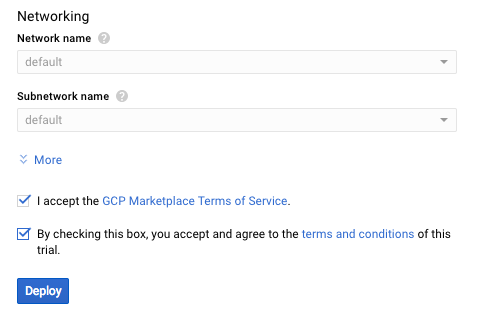
Since we are not doing anything crazy here, we will stick to defaults. Accept the Terms and Conditions and click on “Deploy” at the bottom of the page:
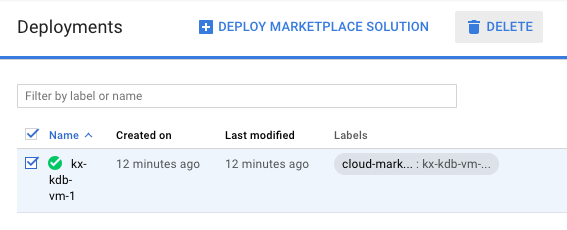
You are now taken to “Deployment Manager” page where you can manage, well, all your deployments. My instance took about a 1 minute to be deployed.
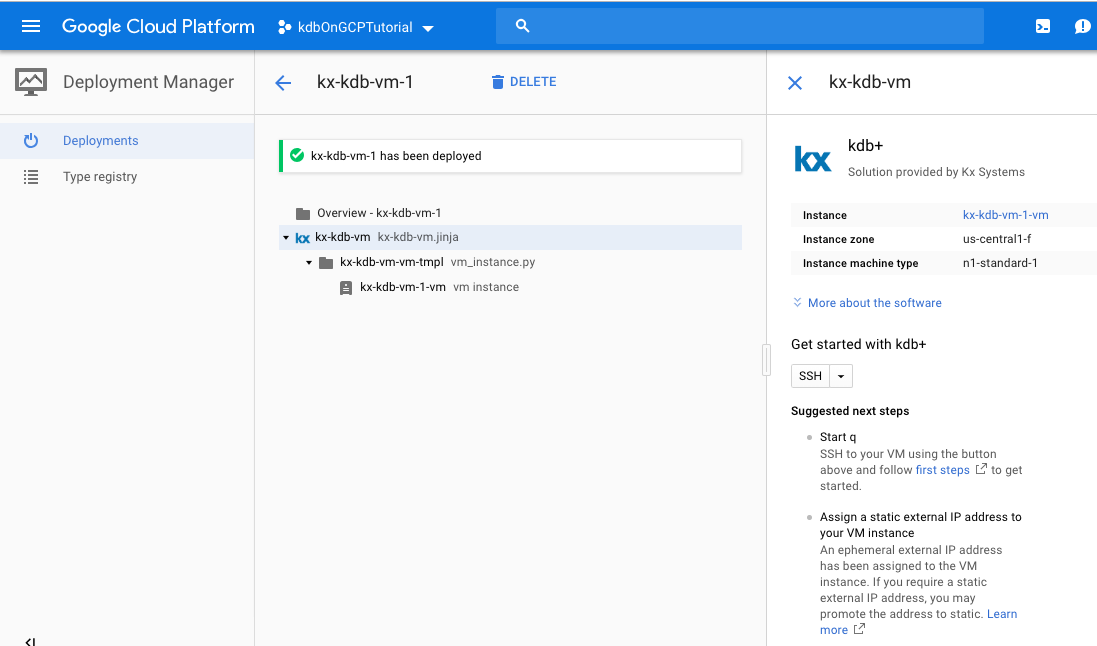
STEP 9: Now that our instance is up and running, we need to connect to it. We will use SSH to do so. On the right hand side, you can see instructions on how to connect to your kdb+ instance via SSH. Click on the ‘SSH’ box and a new window will pop-up. This pop-up is basically your terminal.
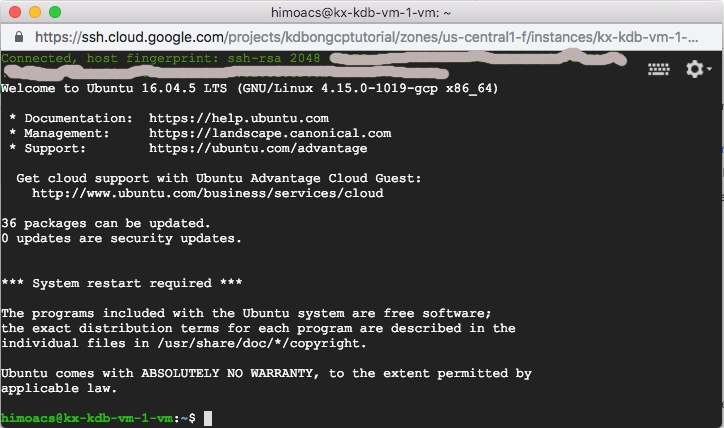
That’s pretty much it. You can now easily start a q session by typing “q”.
himoacs@kx-kdb-vm-1-vm:~$ q
KDB+ 3.6 2018.07.30 Copyright (C) 1993-2018 Kx Systems
l64/ 1()core 3693MB himoacs kx-kdb-vm-1-vm 10.128.0.2 EXPIRE 2019.10.30 450910409183 GCP #5000381

q)"hello world"
"hello world"
q)trade:([]sym:100?`AAPL`IBM`MSFT`NVDA`TSLA`NFLX`APRN;price:100?150)
q)10#trade
sym  price
----------
TSLA 140
AAPL 104
TSLA 10
MSFT 1
APRN 90
AAPL 73
MSFT 90
AAPL 90
NVDA 101
MSFT 97
STEP 10: Once you are done, go back to the “Deployment Manager” page and ‘Delete’ your deployment:
 It took about 2-3 minutes to terminate my instance.
That’s it! Hope you found the tutorial helpful. As mentioned earlier, be careful when starting instances on any cloud platform and make sure to terminate them once you are done.